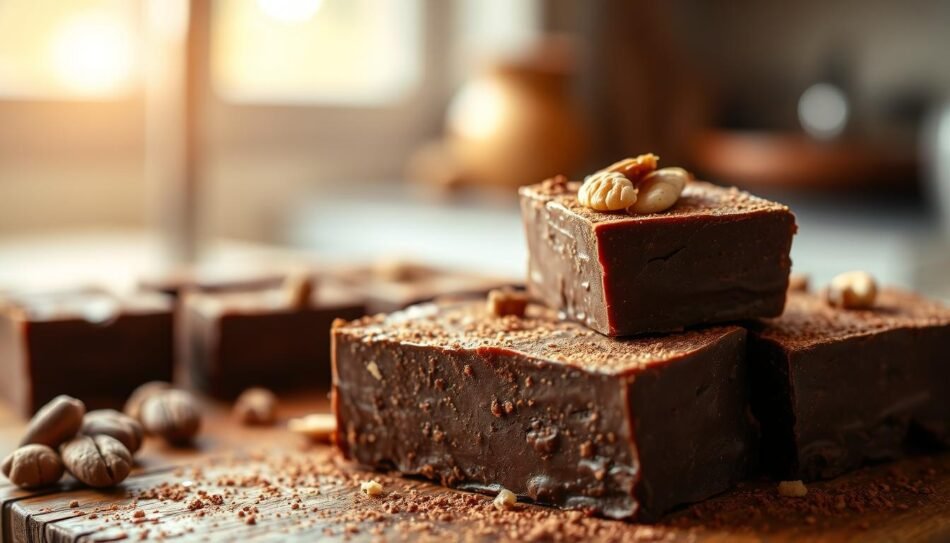
Learn how to make delicious homemade fudge with this easy fudge recipe. With just a few simple ingredients and steps, you’ll create rich, creamy chocolate fudge in no time
Imagine making a decadent dessert in just 15 minutes. This easy fudge recipe takes you to chocolate heaven. It turns simple ingredients into a rich, creamy treat that will wow everyone. It’s perfect for both beginners and experienced cooks, ensuring delicious results every time.
No fancy equipment or complex techniques are needed. Just three ingredients are all you need for the most incredible homemade fudge. This recipe makes creating professional-quality desserts easy for anyone with a sweet tooth.
Key Takeaways
- Super simple 3-ingredient chocolate fudge recipe
- Perfect for bakers of all skill levels
- Ready in just 15 minutes
- No special equipment required
- Great for holiday gifts or personal indulgence
Why This Easy Fudge Recipe Works
Making the best fudge doesn’t have to be hard. Traditional fudge can scare even skilled bakers with its exact temperatures and tricky steps. Our 3 ingredient fudge recipe makes it easy for everyone to enjoy.
Perfect for Beginners
If you’ve felt lost in complex recipes, this fudge is great for you. It’s simple and quick, letting beginners make a tasty treat with little effort.
- No advanced culinary skills required
- Foolproof method for consistent results
- Quick preparation time
No Candy Thermometer Required
Forget about tricky temperature tracking. This recipe doesn’t need special tools, making it easy and stress-free. You won’t have to worry about exact temperatures or hard-to-use tools.
Minimal Ingredients Needed
This 3 ingredient fudge is all about simplicity. With just a few quality ingredients, you can make a dessert that tastes like it’s from a pro bakery.
| Traditional Fudge | Our Easy Fudge |
|---|---|
| Multiple ingredients | 3 simple ingredients |
| Complex preparation | Quick and easy method |
| Requires expertise | Beginner-friendly |
Your dessert-making journey just got simpler. This recipe shows that delicious doesn’t have to mean difficult.
Essential Ingredients for Perfect Fudge
Making the best fudge starts with picking top-notch ingredients. Your fudge’s quality depends on what you choose. Let’s look at the main ingredients that turn simple items into a rich treat.
Chocolate: The Foundation of Great Fudge
Choosing the right chocolate is key for your fudge. Semisweet chocolate gives a deep, rich taste that makes your fudge stand out. Experts say using premium brands like Ghirardelli is the best way to get a luxurious taste.
- Semisweet chocolate chips
- High-quality chocolate bars
- Dark chocolate for deeper flavor
Sweetened Condensed Milk: The Secret Weapon
Sweetened condensed milk is the magic that makes your fudge smooth and creamy. It adds sweetness and holds the ingredients together, making sure your fudge turns out just right.
| Ingredient | Purpose | Recommended Quantity |
|---|---|---|
| Semisweet Chocolate | Flavor base | 2 cups |
| Sweetened Condensed Milk | Binding and sweetness | 1 can (14 oz) |
| Vanilla Extract | Enhanced flavor | 1 teaspoon |
Optional Flavor Enhancers
To make your fudge even better, try these optional ingredients:
- Vanilla extract for depth of flavor
- Chopped nuts for texture
- Sea salt for a gourmet touch
The secret to the best fudge is using fresh, quality ingredients and following each step carefully.
Kitchen Tools and Equipment Needed
Making delicious homemade fudge is easy. You don’t need a fancy kitchen. Just a few basic tools will help you make a dessert that will wow your loved ones.
Basic Supplies List
Here’s what you need for your easy fudge recipe:
- 8-inch square baking pan
- Aluminum foil
- Nonstick cooking spray
- Microwave-safe bowl
- Rubber spatula
- Measuring cups and spoons
Optional Tools for Advanced Preparation
These tools can make your fudge even better:
- Double boiler for precise chocolate melting
- Candy thermometer
- Parchment paper
- Kitchen scale for precise ingredient measurements
Storage Containers
Storing your fudge right keeps it fresh. Here are some good options:
- Airtight plastic containers
- Glass containers with tight-fitting lids
- Wax paper-lined tin boxes
Tip: Use foil and nonstick spray in your pan. It makes removing and cleaning up your fudge a breeze.
Step-by-Step Instructions for Easy Fudge Recipe
Making this quick chocolate fudge is simpler than you think. This easy dessert recipe turns your kitchen into a chocolate paradise. You only need three ingredients and a little effort.
To begin your 3 ingredient fudge journey, gather your ingredients and set up your workspace. Follow these easy steps for smooth and tasty results:
- Prepare your baking dish by lining it with parchment paper, allowing some overhang for easy removal
- Measure out your chocolate chips precisely – accuracy matters in this simple dessert recipe
- Select a large microwave-safe bowl for melting your ingredients
The melting process needs careful attention. Microwave your chocolate chips, condensed milk, and butter in 30-second intervals, stirring between each interval to prevent burning. Keep going until the mixture is smooth and shiny.
After melting, pour the chocolate mixture into your prepared pan. Use a spatula to spread it evenly, making sure it’s the same thickness everywhere. For a special touch, sprinkle chopped nuts or sea salt on top before it sets.
Refrigerate your quick chocolate fudge for about two hours. This cooling time lets the fudge firm up and get that creamy texture everyone adores. When it’s ready, lift the fudge out using the parchment paper edges and cut it into perfect squares.
Stovetop vs. Microwave Method
When making quick chocolate fudge, you can choose between stovetop and microwave. Each method has its own benefits for making delicious homemade fudge. Let’s look at the techniques for making microwave fudge and traditional stovetop fudge.
Creating the perfect easy fudge recipe means knowing the differences between stovetop and microwave. Your choice depends on your kitchen, how much time you have, and what you like best.
Stovetop Method Explained
The stovetop method lets you control the temperature better for your chocolate fudge. Here’s how to do it:
- Use a double boiler or heavy-bottomed saucepan
- Melt ingredients slowly over low heat
- Stir constantly to prevent burning
- Monitor chocolate’s melting process carefully
Microwave Method Overview
If you want a quick chocolate fudge, the microwave method is fast and easy:
- Melt ingredients in microwave-safe bowl
- Heat in 30-second intervals
- Stir between each heating cycle
- Avoid overheating chocolate
Comparing Pros and Cons
| Method | Pros | Cons |
|---|---|---|
| Stovetop | Better temperature control | Requires more attention |
| Microwave | Faster preparation | Risk of uneven heating |
Whichever method you pick, keep practicing and stay patient. You’ll make perfect, creamy fudge every time.
Tips for Achieving Smooth and Creamy Texture

Making the perfect homemade fudge is all about technique. It’s about turning simple ingredients into a luxurious treat. To get it right, you need to master a few key steps.
Temperature control is key when making fudge. You must watch how you heat and cool the mixture. This prevents grainy textures.
- Stir constantly during the melting process
- Remove from heat at the right moment
- Allow proper cooling time
For ultra-smooth fudge, start with quality ingredients. Use the best chocolate and make sure all ingredients are at room temperature before mixing.
| Technique | Impact on Texture |
|---|---|
| Slow, consistent stirring | Prevents sugar crystallization |
| Room temperature ingredients | Ensures even mixing |
| Precise cooling | Creates smooth, creamy consistency |
To avoid texture problems, follow these tips:
- Use a candy thermometer for precise temperature control
- Beat the mixture gently when cooling
- Let the fudge set at room temperature
With practice, you’ll make fudge that’s as smooth as it gets. It will be so good, it’ll make you feel like a pro.
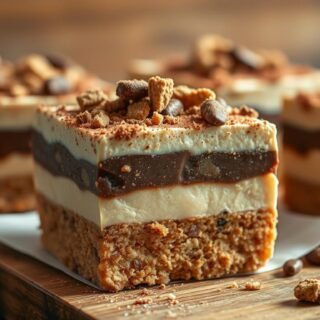
Creative Mix-In Ideas and Variations
Turn your basic homemade fudge recipe into a fun adventure with creative mix-ins. Make your holiday fudge go from simple to spectacular easily!
Nutty and Fruity Delights
Nuts and dried fruits can make your fudge better. Try these tasty options:
- Chopped walnuts for classic crunch
- Toasted pecans for rich flavor
- Dried cranberries for festive holiday fudge
- Sliced almonds for elegant presentation
Flavor Extracts and Unique Add-Ins
Try flavor extracts for unforgettable fudge:
| Extract | Recommended Pairing |
|---|---|
| Peppermint | Chocolate base, crushed candy canes |
| Orange | White chocolate, candied orange peel |
| Almond | Dark chocolate, sliced almonds |
Festive Holiday-Themed Variations
Make holiday fudge with themed mix-ins. Celebrate the season with these ideas:
- Christmas: Crushed candy canes, green and red sprinkles
- Halloween: Candy corn, orange and black sprinkles
- Valentine’s Day: Heart-shaped sprinkles, pink chocolate chips
« The secret to amazing fudge is letting your creativity shine through! »
Pro tip: Fold mix-ins gently to keep your fudge smooth. Add them just before pouring into the pan. This prevents sinking or breaking up during mixing.
Storage and Shelf Life

Keeping your homemade fudge fresh is key. Use the right storage methods to keep your fudge delicious. This way, your easy fudge recipe stays tasty for a long time.
For short-term storage, use an airtight container at room temperature. Wrap the fudge in plastic wrap or a sealed container. This keeps moisture out and the texture creamy.
- Room temperature storage: Up to 2 weeks
- Refrigerator storage: Up to 3 weeks
- Freezer storage: Up to 3 months
Freezing your fudge? Here’s what to do:
- Wrap each piece in wax paper
- Put wrapped pieces in a freezer-safe container
- Let it thaw at room temperature before eating
« The key to maintaining fudge quality is protecting it from air and moisture. » – Baking Experts
Fudge’s texture might change over time. It can get drier the longer it’s stored. Always taste-test your stored fudge to ensure optimal quality.
Pro tip: Enjoy your fudge within two weeks for the best taste and texture.
Troubleshooting Common Fudge Problems
Making the best fudge recipe can be tricky. Even skilled home bakers face challenges. Knowing common problems helps you improve your fudge-making skills.
Grainy texture is a big issue for many. It often comes from sugar crystals forming. To avoid this, remember these tips:
- Stir minimally during cooking
- Use a clean, dry pan
- Avoid scraping down the sides while mixing
If your fudge doesn’t set right, it might be due to wrong temperature or moisture. Precision is crucial in candy making. Use a reliable candy thermometer and cook to the right temperature.
« The secret to perfect fudge is patience and attention to detail. » – Professional Pastry Chef
Chocolate separation is another common problem. If your chocolate looks greasy or split, it’s likely from overheating. Keep these tips in mind:
- Use low, steady heat
- Stir consistently
- Remove from heat immediately when ingredients combine
With practice, you’ll get better at making delicious homemade fudge. It will be smooth, creamy, and look great every time.
Gift-Giving Tips and Packaging Ideas
Making your homemade fudge into a special gift is easy. A simple recipe can turn into a memorable present with the right touch. Your holiday fudge will look amazing and warm with these ideas.
First, pick the right containers for your fudge. Clear packaging lets the chocolate’s beauty show and tease the receiver.
- Clear cellophane bags with festive ribbons
- Decorative tins with parchment paper lining
- Mason jars with custom labels
- Kraft paper boxes with window panels
Think about how to cut and present your fudge:
- Cut fudge into uniform squares
- Layer pieces with wax paper between
- Create varied sizes for visual interest
- Arrange pieces in a visually appealing pattern
Adding a personal touch makes your fudge gift even more special. Make custom labels with ingredients, your name, or a message. Pair your fudge with items like:
| Fudge Type | Pairing Suggestion |
|---|---|
| Classic Chocolate | Gourmet coffee beans |
| Nut-Infused Fudge | Artisan cheese board |
| Seasonal Flavor | Handcrafted mug |
The most important thing in your homemade fudge gift is the love you put into it. Your recipients will love the personal touch of a simple dessert recipe turned into a thoughtful gift.
Conclusion
Your quick chocolate fudge adventure doesn’t end here. This easy fudge recipe is more than a sweet treat. It’s a chance to explore your culinary creativity.
With just a few ingredients and simple steps, you can make a dessert that’s as good as any store-bought one. Making homemade fudge is about finding your own style and flavors. It’s perfect for both new and experienced bakers.
This recipe is simple and easy to follow. You don’t need fancy tools or skills. Just a desire to have fun and try new things. Your kitchen can become a place for sweet creativity, with each batch of fudge telling its own story.
So, grab your ingredients and start making memories. Baking is a way to express yourself and share joy with others. Your easy fudge recipe is just the start of a sweet journey.